

Arduino tips and troubleshooting
This article lists many common problems that may occur when using with Arduino.
java.io.IOException conflict with Windows Defender
In August 2022, I couldn't save sketches anymore and got this error message:
java.io.IOException: The system cannot find the file specified
at java.io.WinNTFileSystem.createFileExclusively(Native Method)
at java.io.File.createTempFile(File.java:2024)
at processing.app.BaseNoGui.saveFile(BaseNoGui.java:886)
at processing.app.SketchFile.save(SketchFile.java:287)
at processing.app.Sketch.save(Sketch.java:138)
I reported it on this forum: https://forum.arduino.cc/t/java-io-ioexception-when-saving/1023157
The solution is to exclude any files opened by Arduino.exe from Windows Defender. This is the procedure:
Start > Settings > Update & Security > Windows Security > Virus & threat protection > Manage settings > Exclusions > Add or remove exclusions > (Windows security YES) > Add an exclusion: C:\Program Files (x86)\Arduino\arduino.exe.
MiniCore
I recommend installing the MiniCore
It has a lot of advantages:
- Arduino cores for the ATmega328PB, ATmega328, ATmega168, ATmega88, ATmega48 and ATmega8.
- Optiboot for increased functionality.
- Two extra I/O pins if the internal oscillator is used.
- PB6 and PB7 is mapped to Arduino pin 20 and 21.
- All relevant keywords are being highlighted by the IDE through a separate keywords file.
Use the MiniCore for programming the ATmega328PB
The ATmega328PB (with the B) is the successor of the ATmega328P.
ATmega328PB vs ATmega328P
- The ATmega328PB has two extra I/O pins: PE0 and PE1
- The ATmega328PB is cheaper
We have to install the MiniCore, see all the information at GitHub https://github.com/MCUdude/MiniCore
File > preference > Additional Boards Manager URL = https://mcudude.github.io/MiniCore/package_MCUdude_MiniCore_index.json
Board = Minicore / ATmega328
Variant = 328PB
How to use pin PE0 and PE1
The pins PE0 and PE1 can be used as digital I/O as follow:
pinMode(SDA1, OUTPUT); // SDA1 = PE0

digitalWrite(SDA1, 1);

pinMode(SCL1, OUTPUT); // SCL1 = PE1

digitalWrite(SCL1, 1);
Installing missing libraries
If an Arduino library or a sketch of mine doesn't work, it's usually because of missing libraries. For instance when the library "Timer1" is missing, we receive the compiler message: "'Timer1' was not declared in this scope", than you have to install this library too. I use many libraries, those of others and of myself. I have collected all those libraries in a zip file that you can download HERE. Sometimes I forget to update the zip file so it can happen that something is missing:
Let me know if a library or sketch doesn't work and I will update the library zip file.
Old bootloader upload problems with Arduino Nano and Pro-Mini boards
Some years ago, I used an Arduino Nano board. Now I wanted to use this board again. But suddenly, error messages occur when uploading a sketch. That is strange, it has always worked before! The same happens with an Arduino Pro-Mini board.
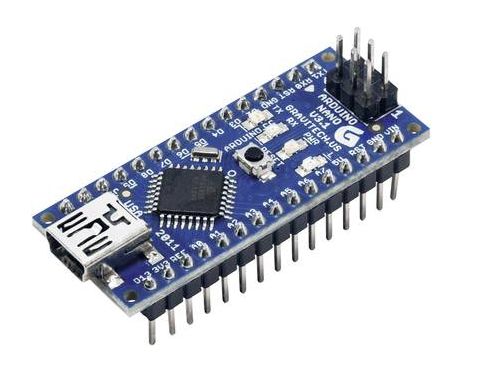
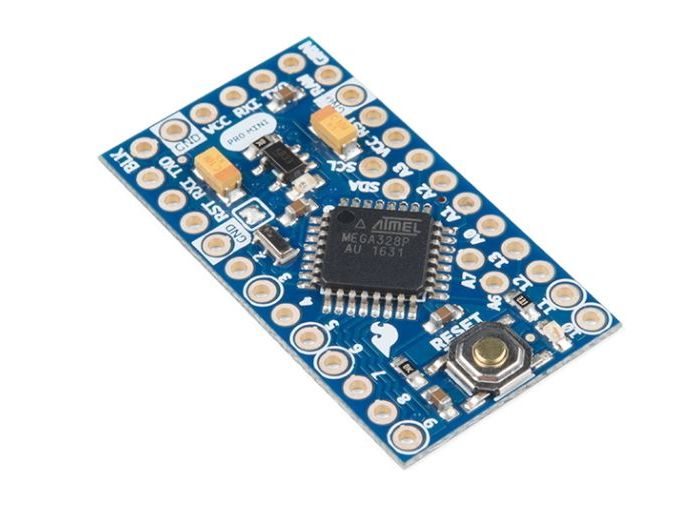
The reason is that old Nano boards have an outdated bootloader, which then no longer works with the new Arduino IDE versions. In this case, select the following in the tools menu:
Tools> Boards > Arduino Nano
Tools> Processor> ATmega328P (Old Bootloader)
The processor menu only appears if the Arduino Nano is first selected
 Old bootloader upload problems with Arduino Nano and Pro-Mini boards
Upload problem with wrong bootloader
A very difficult problem is a bootloader that is not supported. I experienced this with boards with an ATmega328 that I had let fabricate in China. I could not upload sketches to these boards with the Arduino version 1.8.9. After I had burned a new boot loader with this Arduino version into the ATmega328, uploading worked again. Unfortunately, it is not always possible to program a new boot loader if there is no SPI connector.
Bad USB cables
Note that there are USB cables that don't have the data lines in the cable but only power and ground. You better throw these away.
Old driver problem
Old driversThe most stubborn problem these days is old drivers. None of the operating systems in common use update drivers unless you manually update the drivers. It seems like Mac OS is the biggest offender.
If uploading sometimes works well and sometimes doesn't work
It often happens that uploading doesn't work well. The upload application is not very stable, sometimes it helps to close the program and connect the USB cable again, or close Windows and start again. This drives me crazy sometimes. To find the cause, test an Arduino board that has always worked well.
Troubleshooting if Arduino applications don't work
My Arduino applications and libraries are tested with the Arduino software version used at the time of development. After installation of a new Arduino software version, problems may arise with existing projects. I don't have time to regularly test all my software on newer Arduino versions, so let me know if problems occur.
To solve a problem, read this page, and first check if the Arduino works well with some simple sample projects. Normally, by building up the application step by step, you will find out what the problem is.
Don't forget to select the right board: Tools > Board > and the serial port: Tools > Serial Port.
Fake FTDI adapter 5V/3.3V breakouts without regulator
Some Arduino applications only work on 3.3V. If the 3.3V Arduino board itself does not have a USB interface, it can be programmed and tested with an FTDI breakout board that must be switchable between 5V and 3.3V.
Please note that there are many FAKE 5V / 3.3V switchable FTDI switch cards that do NOT switch the power supply, they always have 5V output!
 Fake FTDI adapter 5V/3.3V breakouts without regulator
Good FTDI adapter 5V/3.3V breakout with regulator
 FTDI adapter 5V/3.3V out breakout WITH regulator
I replaced the switch with a 3-pin jumper to prevent accidental operation of the switch causing 5V to be applied to the output. That can blow up 3.3V integrated circuits. Then glue the jumper with 2-component epoxy glue:
 CH340 FTDI 232 USB adapter 3.3V 3
You can buy this FTDI breakout board here: https://www.ezsbc.com/
How to install Arduino libraries
Read this first: Adafruit has written an extensive manual about the installation of libraries: Arduino Libraries.
Summary:
Use the library manager if possible, if the library is not available here than:
Place it the Sketchbook folder. You can change the Sketchbook location with File>preferences:
 Arduino change sketchbook location
To convert an Arduino sketch into a library file, change the extension from .ino to .cpp.
Arduino doesn't accept file and folder names with a dash (-), use the underscore (_) instead.
I started adding my libraries on GitHub to make downloading and installation easier.
How to include libraries
There are two ways to include libraries:
- With greater and less than sign
#include <libname.h>
This is used normally to include libraries that are located in the library folder:
C:\Program Files (x86)\Arduino\libraries
- With quotation marks
#include "libname.h"
This is to include libraries that are located in the sketch folder or in the the library folder. The first situation is needed if the libraries that are used by the sketch, also need to be edited.
If a library update doesn’t work
When deleting a library, it is not enough to delete only the files inside the library folder, you have to delete the library folder itself too. Else, it may happen that after you add new library files, the library won’t work properly. Arduino may still use cached object files from a previous build.
Make a copy of the preference.txt file.
Sometimes the Arduino software doesn't work anymore, at least on Windows XP; the preference.txt file may be corrupt. Put the old preference.txt file back and try again. If this doesn't work, the computer has to be start up again. For Windows XP c:\Documents and Settings\\Application Data\Arduino\preferences.txt.
Upload problem with programs > 62k byte
A big issue, but unknown to most people, is that the Arduino IDE has bugs related to programs bigger than about 62kb. When the program gets to be big enough so that the hex file exceeds 64k then you can get programs that download but doesn't work. This is particularly common if you use programming hardware to download the program. If you use a programmer or ICE to download the program the image includes the bootloader and if the program plus bootloader exceeds 64k the image for downloading is broken. This is a bug and the daily builds include a fix but none of the stable releases includes the fix.
It also affects the AVR processors that have 64k or more of program space.
It doesn't affect ESP32 or ESP8266 boards because the bootloader is never merged with the user's program since it's stored in ROM and never needs to be downloaded.
Package installation
To use new Arduino boards, such as the Arduino Zero, we have to install an appropriate package, which describes the processor and pins. See here the package installation procedure.
Adding a board to the boards manager list
If a boards is not already in the boards manager list, it should be added.
Look for the board in the Unofficial list of 3rd party boards support urls and copy the URL json.
File > Preferences > paste the URL in the field "Additional Boards Manager URLS".
Changing the Arduino IDE colors
Some colors of the Arduino development environment are awkward and make text almost unreadable. See here how you can change that.
 Improved Arduino colors for better visibility
Troubleshooting with installing new Arduino software versions
After the installation of a new Arduino software version, problems arise often with existing projects.
Compiler differences and missing or incompatible libraries may cause compiler errors like these:
'blabla' was not declared in this scope
'blabla' does not name a type
expected ',' or '...' before 'blabla'
ISO C++ forbids declaration of 'blabla' with no type
See here what to do:
- Libraries can't be found
Installed additional libraries are not moved to the new Arduino environment, they have to be installed again. - Incompatible libraries
Older additional libraries may be not compatible with newer Arduino software versions, so update the libraries too. - Compiler differences
See further.
Arduino.h and WProgram.h
For recent Arduino versions (since 1.0) we have to use:
#include "Arduino.h"
instead of
#include "WProgram.h"
This change was not handy because all old software doesn't work anymore without modifing these lines.
So, if a program doesn't run, install the latest Arduino version and change the above lines in the program and / or libraries.
Compiler differences between Arduino software versions
After the installation of a new Arduino software version, problems arise often due to compiler differences. See here what to do:
- Tabsheet ino extention
Tab sheets should have the extension *.ino now, otherwise global variables from other tab sheets are not recognized. - Inline public member functions
Public member functions can't be inline anymore.
Problems with bad FTDI USB Serial Adapter Modules
I had bought a FTDI module which caused problems. The first-time upload always works fine, but with a too low speed. After this, problems occur, uploading sometimes works well, sometimes not:
avrdude: stk500_recv (): programmer is not responding
avrdude: stk500_getsync () attempt 1 or 10: not in sync: resp = 0xa7
The cause was the particular FTDI adapter, other adapters worked fine.
Missing boot loader
I recently purchased from different suppliers in China the ATmega328P-PU with UNO boot loader; however, none had the bootloader programmed. You can check this; the LED has to blink several times after power up, else there is no bootloader. So I had to figure out how to program the boot loader myself. I use this ISP programmer.
Upload speed problems
Arduino boards have all different serial baud rates, from 9600 to 115200, these are set in the file C:\Program Files\Arduino\hardware\arduino\boards.txt.
For instance: uno.upload.speed=115200.
But too often, the speed isn't correct if your Arduino board is outdated, than you must edit the boards.txt file. Since the baud rate is set in the bootloader, swapping an ATmega chip can also lead to speed problems if the bootloader is outdated.
General Arduino tips
- One c++ code file name (.ino) must be equal to the project folder name. A copy of a project shall not run anymore because the project map name is changed to "Copy of ...". To avoid this, place the project map into another map, this can further be copied without problems.
- Older Atmega boards, before 2010, may have a slower baudrate of 19200 instead of 57600 baud for recent boards. During uploading an error may occur like: avrdude: stk500_getsync(): not in sync: resp=0x00. To fix upload problems, edit the file hardware\arduino\boards.txt:
Change atmega328.upload.speed=57600 to atmega328.upload.speed=19200 - Turn on the internal 20k pull up resistors: pinMode(pinBlabla, INPUT); digitalWrite(pinBlabla, HIGH);
- Variables used inside interrupt service routines and also outside them have to be volatile. This prevents that the compiler removes the variable during optimization. For instance: volatile int i.
- The analog pins can be used identically to input/output digital pins, using the aliases A0, A1 etc.
- Dynamic memory allocation (new en delete) was introduced in Arduino 1.0.1 in 2011.
Arduino C++ anomalies
Although Arduino is programmable in C++, there are a few exceptions.
- Instead of a mandatory function main(), the Arduino need to have these two functions:
- void setup(void) and void loop(void).
- The Arduino uses for a c++ code file the extension .ino, instead of .cpp. The extension .cpp may be used too, but at least one file must have the extension .ino.
- Library inline functions must be placed in the header file. Inline member functions can be placed in the cpp file.
- At the Arduino, we can use explicit only at declarations of constructors.
- Function templates must be placed in a header instead of a cpp file ( template <class T> ).
Arduino peculiarities
While I was reducing the Switch library program size, weird things came to light:
- Variables of type bool instead of byte, increases the program size with 6 byte.
- Initialization of member variables with parenthesis in a constructor, consumes 6 bytes more when using for instance pin(pin) instead of pin(_pin).
|
Switch::Switch(byte _pin):
pin(_pin) // _ is not required
Switch::Switch(byte pin):
pin(pin) // consumes 6 bytes more
|
- Reading a public member variable directly (classBlabla.x) consumes 54 bytes more than using a getter (classBlabla.read()).
- Initialization of member variables to 0 costs 2 bytes, although they are set to 0 by default.
Saving ATmega program memory and RAM
- In contrast to the usual practice, don't initialize variables; this takes extra program space. Variables will be initialized to zero automatically.
- Use the Flash library, see below.
- Place constant data in program memory instead of RAM:
const PROGMEM char str[] = "blabla"; - Comment out unused and debug code with // or /* */. Unused member functions however, take no extra code.
- Use byte instead of int if possible:
for(byte i=0; i<3; i++) instead of int saves about 12 byte program memory. - Avoid floating point operations; the large floating point library uses a lot of program memory.
- Saving ATmega memory with the Flash library:
Serial.println("blabla") uses 7 byte RAM and 7 byte program memory. Avoid this by using the Flash library:
Serial.println(F("blabla")) uses only 7 byte program memory. Or use:
Serial << F("blabla"). - Don't use endl, << endl; takes 60 byte more program space than << "\n";
Easy printing with the overload stream operator <<
Using the Streaming.h library makes printing to the PC or LCD simpler. It generates no extra program memory:
Serial << "blabla: " << data << " blabla";
Streaming is such an important c++ feature that it should be integrated standardly in the Arduino environment. However, this is not the case; download the latest streaming library from Mikal Hart HERE.
Easy printing of multiple variables with comma separator ','
Serial << a, b, c;
Instead of:
Serial << a << " " << b << " " << c;
Formatting manipulators
_HEX _OCT _BIN _BYTE _DEC
Floats: Serial << _FLOAT(x,6); // 6 digits 0.000977
Hexadecimal notation
0x6BF0 is 27632
New and delete
int n = 100;
int i = new int[n];
Heap Fragmentation
Prefixes and Suffixes
integer-literal-in-c-cpp-prefixes-suffixes
Notations
4389.88L = long
uint8_t = byte
Inline functions with the Arduino
- About 8 ... 50 byte program memory can be saved when functions are made inline. It depends on the number of times the function is called and on the size of the function, whether it makes sense. By using refactoring, code is split into small member functions, which is part of Extreme Programming. When these functions are inline, no extra code will be generated.
-
C++ compilers may sometimes determine itself, which functions become inline and which not. In the past, member functions were made implicit inline by the Arduino compiler, but I have experienced that this is not the case anymore. So, to be sure, add inline if you need that.
-
Inline public class-member functions are not allowed.
- Inline library functions must be placed in the header instead of the cpp file.
My Arduino wish list
- Remember the window size.
- The serial monitor needs a stop button.
- Solve incompatibility, using just #include "Arduino.h".